Kodak Portra 400
on Fujifilm
The most-requested film look on any camera, period. Soft contrast, honest skin tones, a gentle golden lean. Here's what makes Portra 400 feel like Portra 400 — and the Fujifilm recipes that translate it onto an X-Trans body.
Kodak's flagship 1998 colour negative, ISO 400, designed for portraits and weddings. The defining look of contemporary editorial portraiture.
Reference look
What we're translating
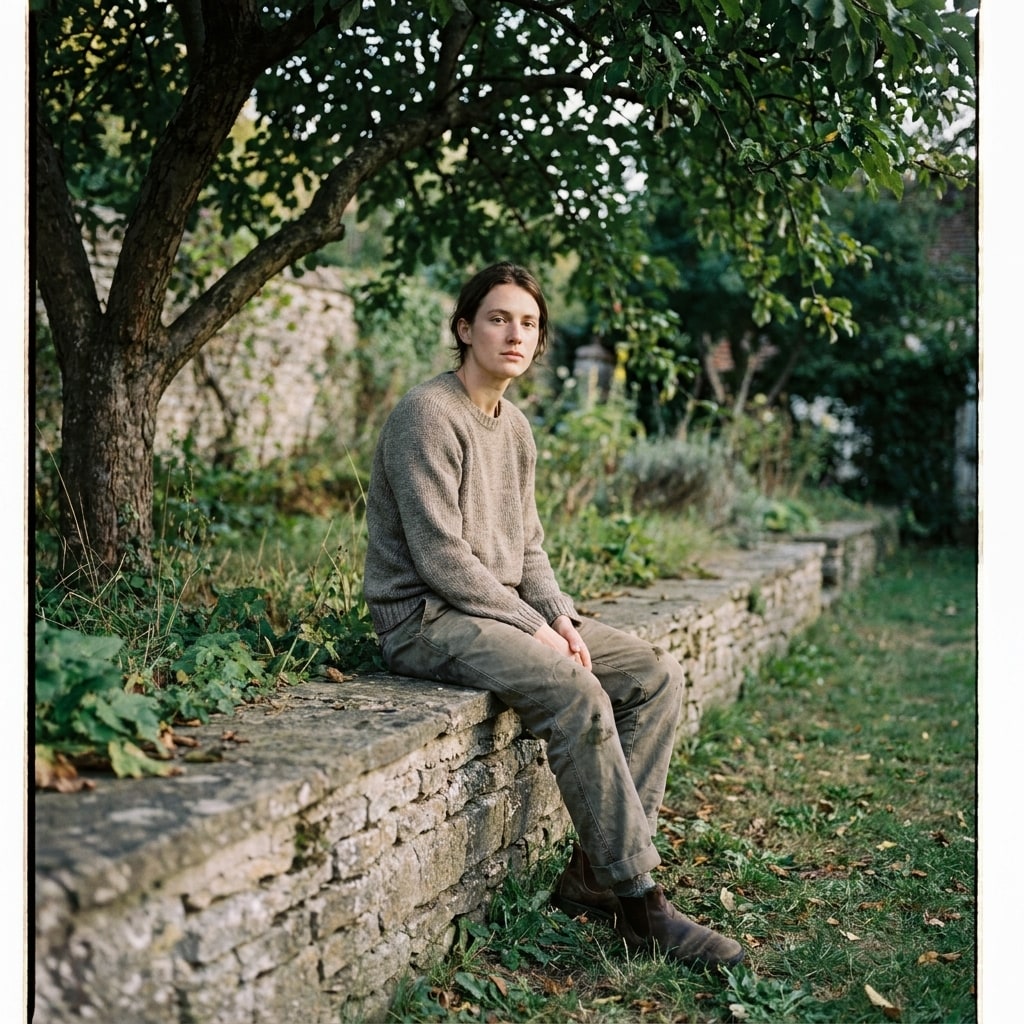
A representative scene in the Kodak Portra 400 register — the colour, contrast, and composition the recipes below try to land on a Fujifilm body straight out of camera.
AI-rendered approximation (Gemini 3 Pro Image, prompted to match the Kodak Portra 400 aesthetic). Not a frame from the source material — used for visual orientation only.
What people mean by “Portra 400 look”
Portra 400 is a colour negative film, not a colour positive — that single fact explains most of its character. Negatives have wider exposure latitude than slide film, so highlights roll off gently instead of clipping; they have softer microcontrast, so faces look honest rather than crunchy; and they have a warm baseline in midtones — the legacy of being designed to flatter skin under tungsten and afternoon daylight.
The look that travels under “Portra 400” online — the warm-but-not-orange, slightly-faded, skin-flattering image you see in wedding portfolios and travel zines — is the print look, not the negative itself. Lab scans push warmth in midtones, lift shadows a touch, hold a soft S-curve. Reproducing that on a Fujifilm sensor means three moves:
- A film simulation with a wide DR and soft tone curve — Classic Negative is the closest match (Pro Neg Hi is the runner-up).
- Warm white-balance shift — small red-positive on WB shift, so the scene leans amber without going orange.
- Held-back shadows and slightly negative colour — a Portra scan never crushes blacks, and it never pushes saturation.
That’s the spec. Below is the Fuji recipe that delivers it on X-Trans IV and V bodies.
Why this is hard to fake with presets
Lightroom presets that ship as “Portra 400” work on RAW files in post — they paint a curve and a colour shift on top of whatever the camera captured. In-camera film simulations have to bake the look into the JPEG at capture time — no second pass. That puts every recipe choice (dynamic range, white-balance shift, highlight/shadow, grain) on tighter rails: you have to nail it once, then shoot.
The advantage is the look ships straight out of camera. No Lightroom, no plugin subscription, no laptop in the bag — just the file. That’s the whole point of a Fuji recipe vs a Lightroom preset.
What to look for
When you check whether a Fuji recipe is delivering a real Portra look (vs a warm filter):
- Skin holds detail in shadows without sliding orange in midtones.
- Highlights on cheekbones / forehead don’t blow — they fall back to cream, not white.
- Whites (a shirt, a wall) stay slightly warm, never pure neutral.
- Greens (foliage in a portrait background) read olive, not emerald.
If any of those four are wrong, the recipe is doing something else.
Recipes that deliver it
1 recipe · ready to shoot